Dropzone Commander - Painting Shaltari

It all started with this beautiful beast. Such an awesome model and paint job. I was in love and I knew I had to collect Shaltari immediately.

After much searching I managed to buy a massive second hand lot of Shaltari for a decent price

It was of course WAY too much for me to keep so I sold 2/3 to a fellow dropzoner and kept everything below the wooden stick.

Off goes the Shaltari in the post

I started to go through what I had and a lot of it was bent, broken or just built in really bad poses. The worst offender was the thick paint on some models, which was of course in a completely different colour to what I want.
So it was time to strip the paint, and also hopefully loosen the superglue too so I could reposition.
I had a google and a lot of the recommendations I found were for chemicals not easily obtainable here in the UK, however I saw one classic chemical the was frequently popping up... DETTOL

I promptly bought a bottle and then threw in a sacrificial yari tank. I left it in for a few hours and then gave it a scrub with an old toothbrush. The result was OK. The Dettol had removed the surface paint but was not able to get down into the recesses, which is where I really wanted the paint outta there due to the incredible amount of recessed detail on these models.


Throughout the course of the week, all the painted models would take baths in the Dettol with varying results. Primer paint was particularly difficult to remove.
I had a laugh when a tank came up out of the first Dettol bath looking like a Chinese Ming Vase. I actually quite like this look of this, but I didn't think I would be able to replicate this using paint and inks, so back into the Dettol it went.

Dettol is quite disgusting to use with resin models as it doesn't dissolve the paint but instead loosens it. Fine for thick surface paint but it really doesn't do much for anything in the recesses or stubborn primer paint.
In addition to being difficult to work with, Dettol annihilates the skin your hand, smells awful and also leaves the smell on the model for weeks. A solution to remove the smell is to scrub the models down with Bicarbonate of Soda (baking soda), which amazingly helps quite a bit.
I wouldn't Dettol again but would instead try "Biostrip 20" for the next attempt.
Before and after a soak in Dettol. The Dettol worked really well on the top layers of paint where you have paint painted on top of... well more paint.


Top tip when working with Dettol.. wear gloves! The solution really destroys your skin.

After everything was stripped I got to work with tearing everything apart for re-positioning and also pinning weapon systems, which are quite prone to snapping off.
Here is my pro tip to adjusting TTC resin. Get it blasted with steam from the kettle, the resin will remember what shape it should had been and will magically re-adjust. You can also use this opportunity to bend to a shape you prefer and let it cool while holding it in shape.
Right, time to get painting!
My plan was to try and replicate the original studio design. The original painters and TTC staff very kindly chipped in with some tips but unfortunately the ink that I had to use was long discontinued from GW. I bought the next best thing that they recommended and got straight to painting!
Please note that the below is how NOT to do it.. Learn from my mistakes...
First of was to airbrush Vallejo Air Model Yellow on a white primer. Alternatively I could have just primed everything yellow with one of the army painter cans. You can brush it on but I was keen to try and keep as much fine detail as I can as there is a lot!


With that done the next stage was to airbrush the army painter red tone (ink) on to the models. The ink has to be air brushed on as otherwise you will not get the correct effect.

This is how it looks after a good few coats. I was pretty happy with how it was looking at this stage, though it looked far from the original studio shots.

Now the BIG problem is that when wet the army painter red tone looks nice, glossy and importantly.. RED. However once it dries it goes BROWN! Ahhh!!
It seems that it is an incredibly fine line between something with a nice inky red and something brown. I was probably put on a coat or two more than I needed but it is really hard to judge when the ink is wet.
I tried to see if I could correct it and painted one model with yellow highlights and detail etc.. it didn't really make much of an improvement and I hated it.


AGGhhhhhhhh.. what a disaster!!
After much thought I decided that this wasn't the colour I wanted and I had painted too much like this already so I had to strip back to base and try again with a different colour scheme. I have sworn off Dettol but heard good things about Biostrip20. I bought a tub and set it to work

Biostrip is amaaaaaaaaaaaaazing
Very clean job, much better than Dettol.

However, Biostrip20 can do bad things to resin... namely it can make it bendy like rubber. I think I was too quick with priming my models after stripping as I suspect the resin needs to be in contact with the air to stiffen up again.
I had a think about what paint I would try next as I swore off the yellow-red ink combo. First experiment was to use a bottle of red contrast paint from games workshop and gave it a go on two yellow based models. The model on the left has red contrast paint that has been extremely diluted with thinner. The model on the right just has the red contrast paint, slathered over yellow with no thinning.
I absolutely LOVE the effect I was able to get with the thinned red. Such an awesome colour and I figured I could get some funky effects too.. however I didn't think I would be able to get a consistent enough effect for an entire army. The pure red was just rubbish.

So next up I bought a bottle of Gryph-hound orange contrast paint

I slathered it on with a medium-thick coating on a gw white primer. The result was a little disappointing as I wasn't really getting the famous gradients. Could be that this model is too flat or I was not using the correct primer.. I don't know but the result wasn't too bad and was something I could work with as a base.

So I set to work with coating everything in orange

This however was getting a bit mind numbing so a friend recommended that I concentrate on just getting one finished. So I picked this giant butterfly of doom to be the first model I would concentrate on and get finished.
Step one after the orange contrast was to paint the wings yellow.

Then I dry brushed everything with a yellow/orange mix.

Then some silver detailing silver and inking the yellow wings.

Once dry I would drybrush them yellow again... there was probably a more efficient way of doing this!

After that I painted the edges of the wings with contrast orange.

Once done I went about with detailing all the little dots, little silver pipes and things like that. I added some black ink to all silver things to give them some depth, which worked pretty well. Painting the inner teleportation ring and gem was really difficult due to just how inaccessible it was.

After some final touches with edge highlighting in yellow I was pretty happy with how it turned out.
Once everything is dry I will give it a coating of matt varnish for protection and some gloss varnish on the cockpit canopies.
 |

Da booty shot

Bane of my existence.. inner crystal and ring

Bonus shot of two spirit gates that I painted alongside the firedrake

If you made it this far, thanks for reading!
Last blog post

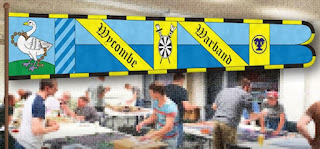
Are you looking for a gaming club in the South East of England that plays Dropzone Commander?
If so join us at Wycombe Warband.


Beautiful work, well done.
ReplyDelete